In this page
How to send emails and reply from a shared email address
You or another teammate created a shared inbox, e.g., [email protected], and you would like to reply to emails using the shared inbox ([email protected]) email address and not your personal email…

You or another teammate created a shared inbox, e.g., [email protected], and you would like to reply to emails using the shared inbox ([email protected]) email address and not your personal email address.
To do so, set-up the "Send mail as" option in your Gmail settings as explained below.
Set up "Send as"
This is a one-time setup which takes 30 seconds:
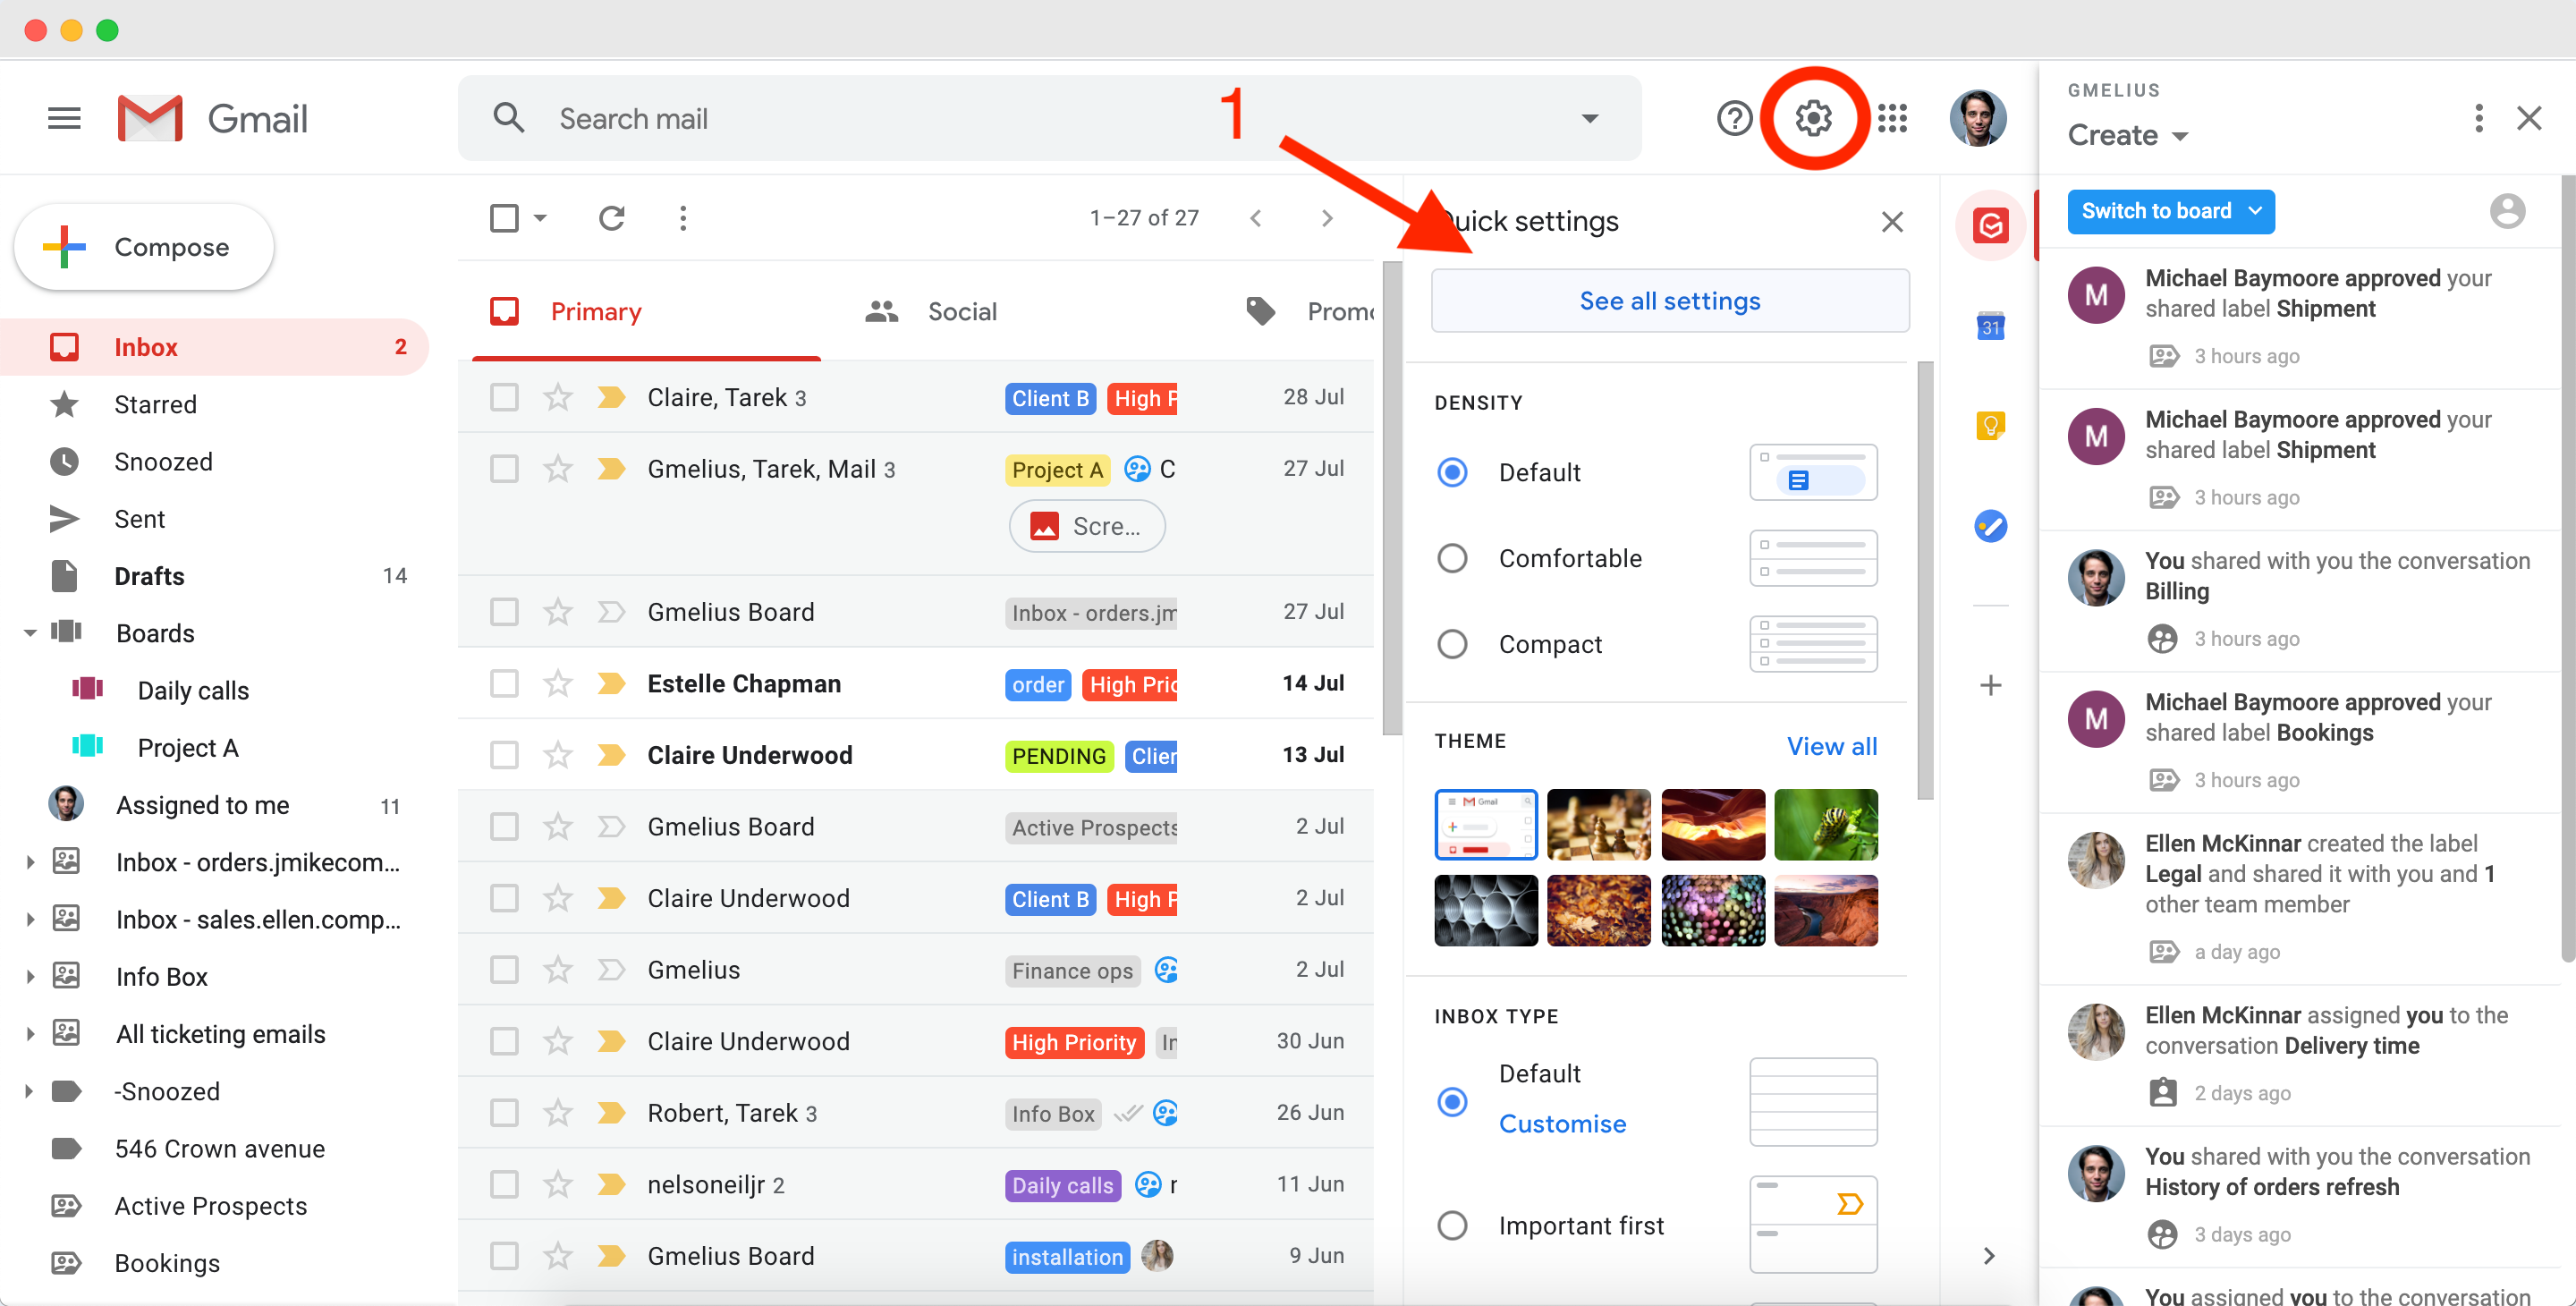
- Click on the gear icon of your Gmail inbox (top right corner) to access Gmail settings;

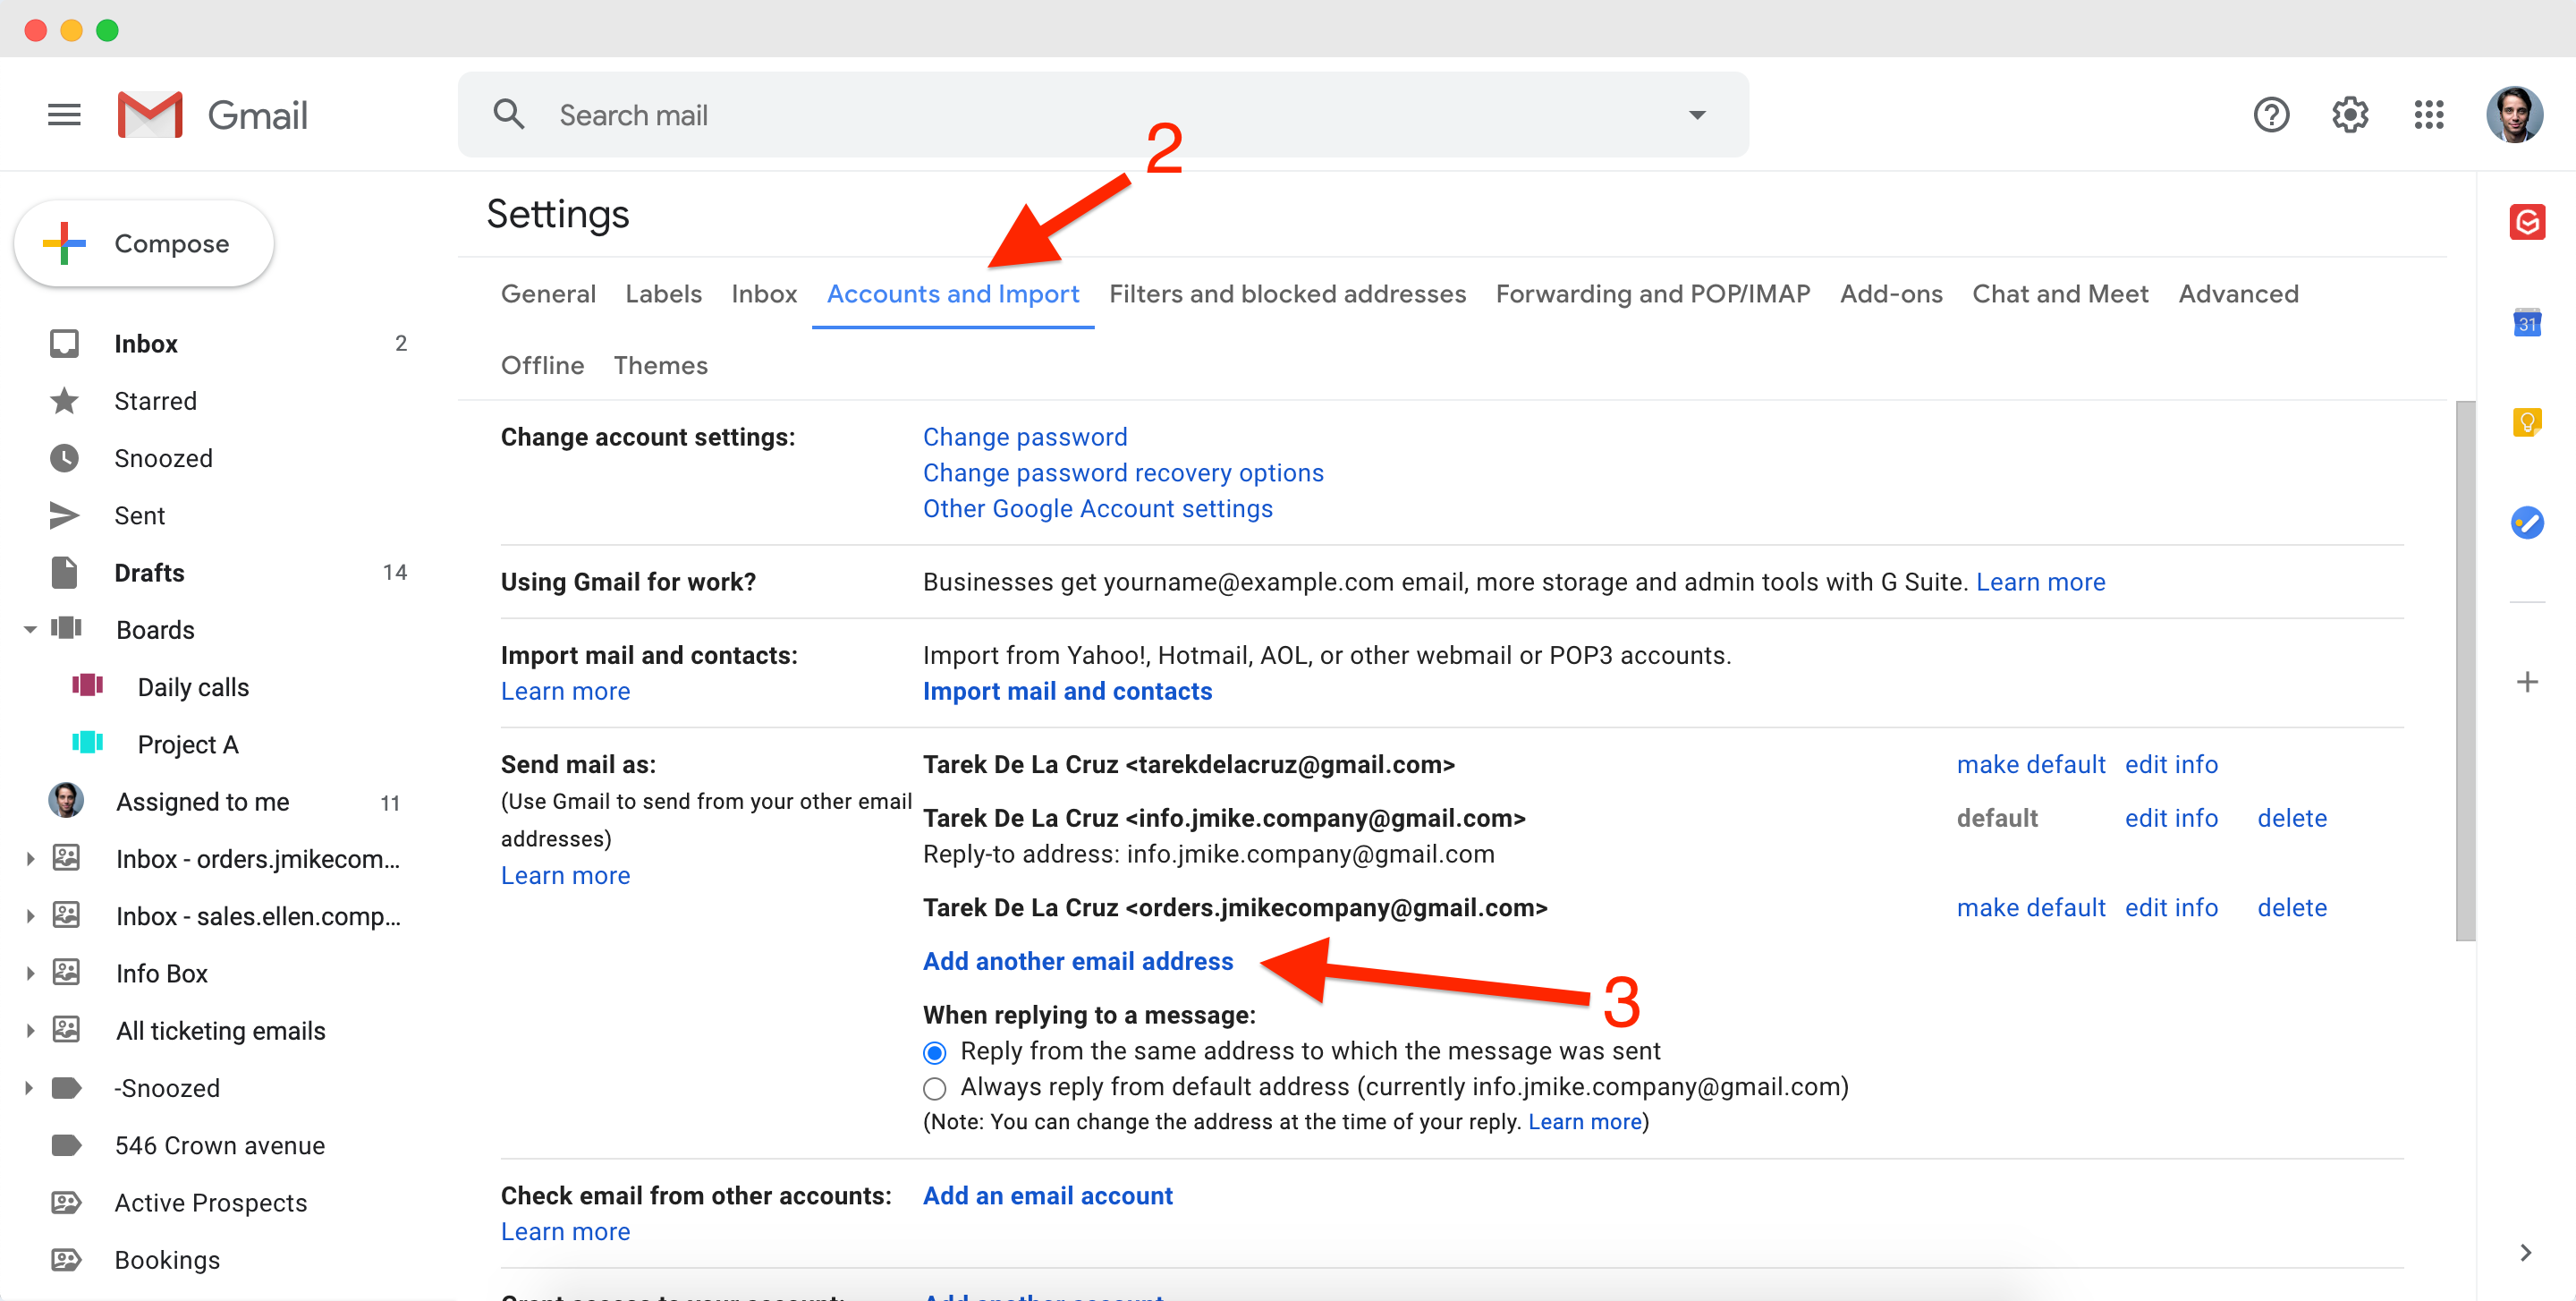
- Select the Accounts and Import tab;
- Under Send mail as: click on the "Add another email address"

- In the Name field, enter the sender's name that you want your email recipients to see (e.g. Jane from Awesome), and in the Email address field, enter the shared mailbox email address (e.g. [email protected]) and uncheck the box "Treat as an alias";
- Click 'Next Step' and then 'Send Verification'. Gmail will send a verification message to your shared mailbox email address (i.e. [email protected]) to confirm the request.
- Once the email has been received, open it and either click the link included in the message or enter the confirmation code in the Accounts section of your email settings (hit Verify).
Automatically reply from your newly created email address
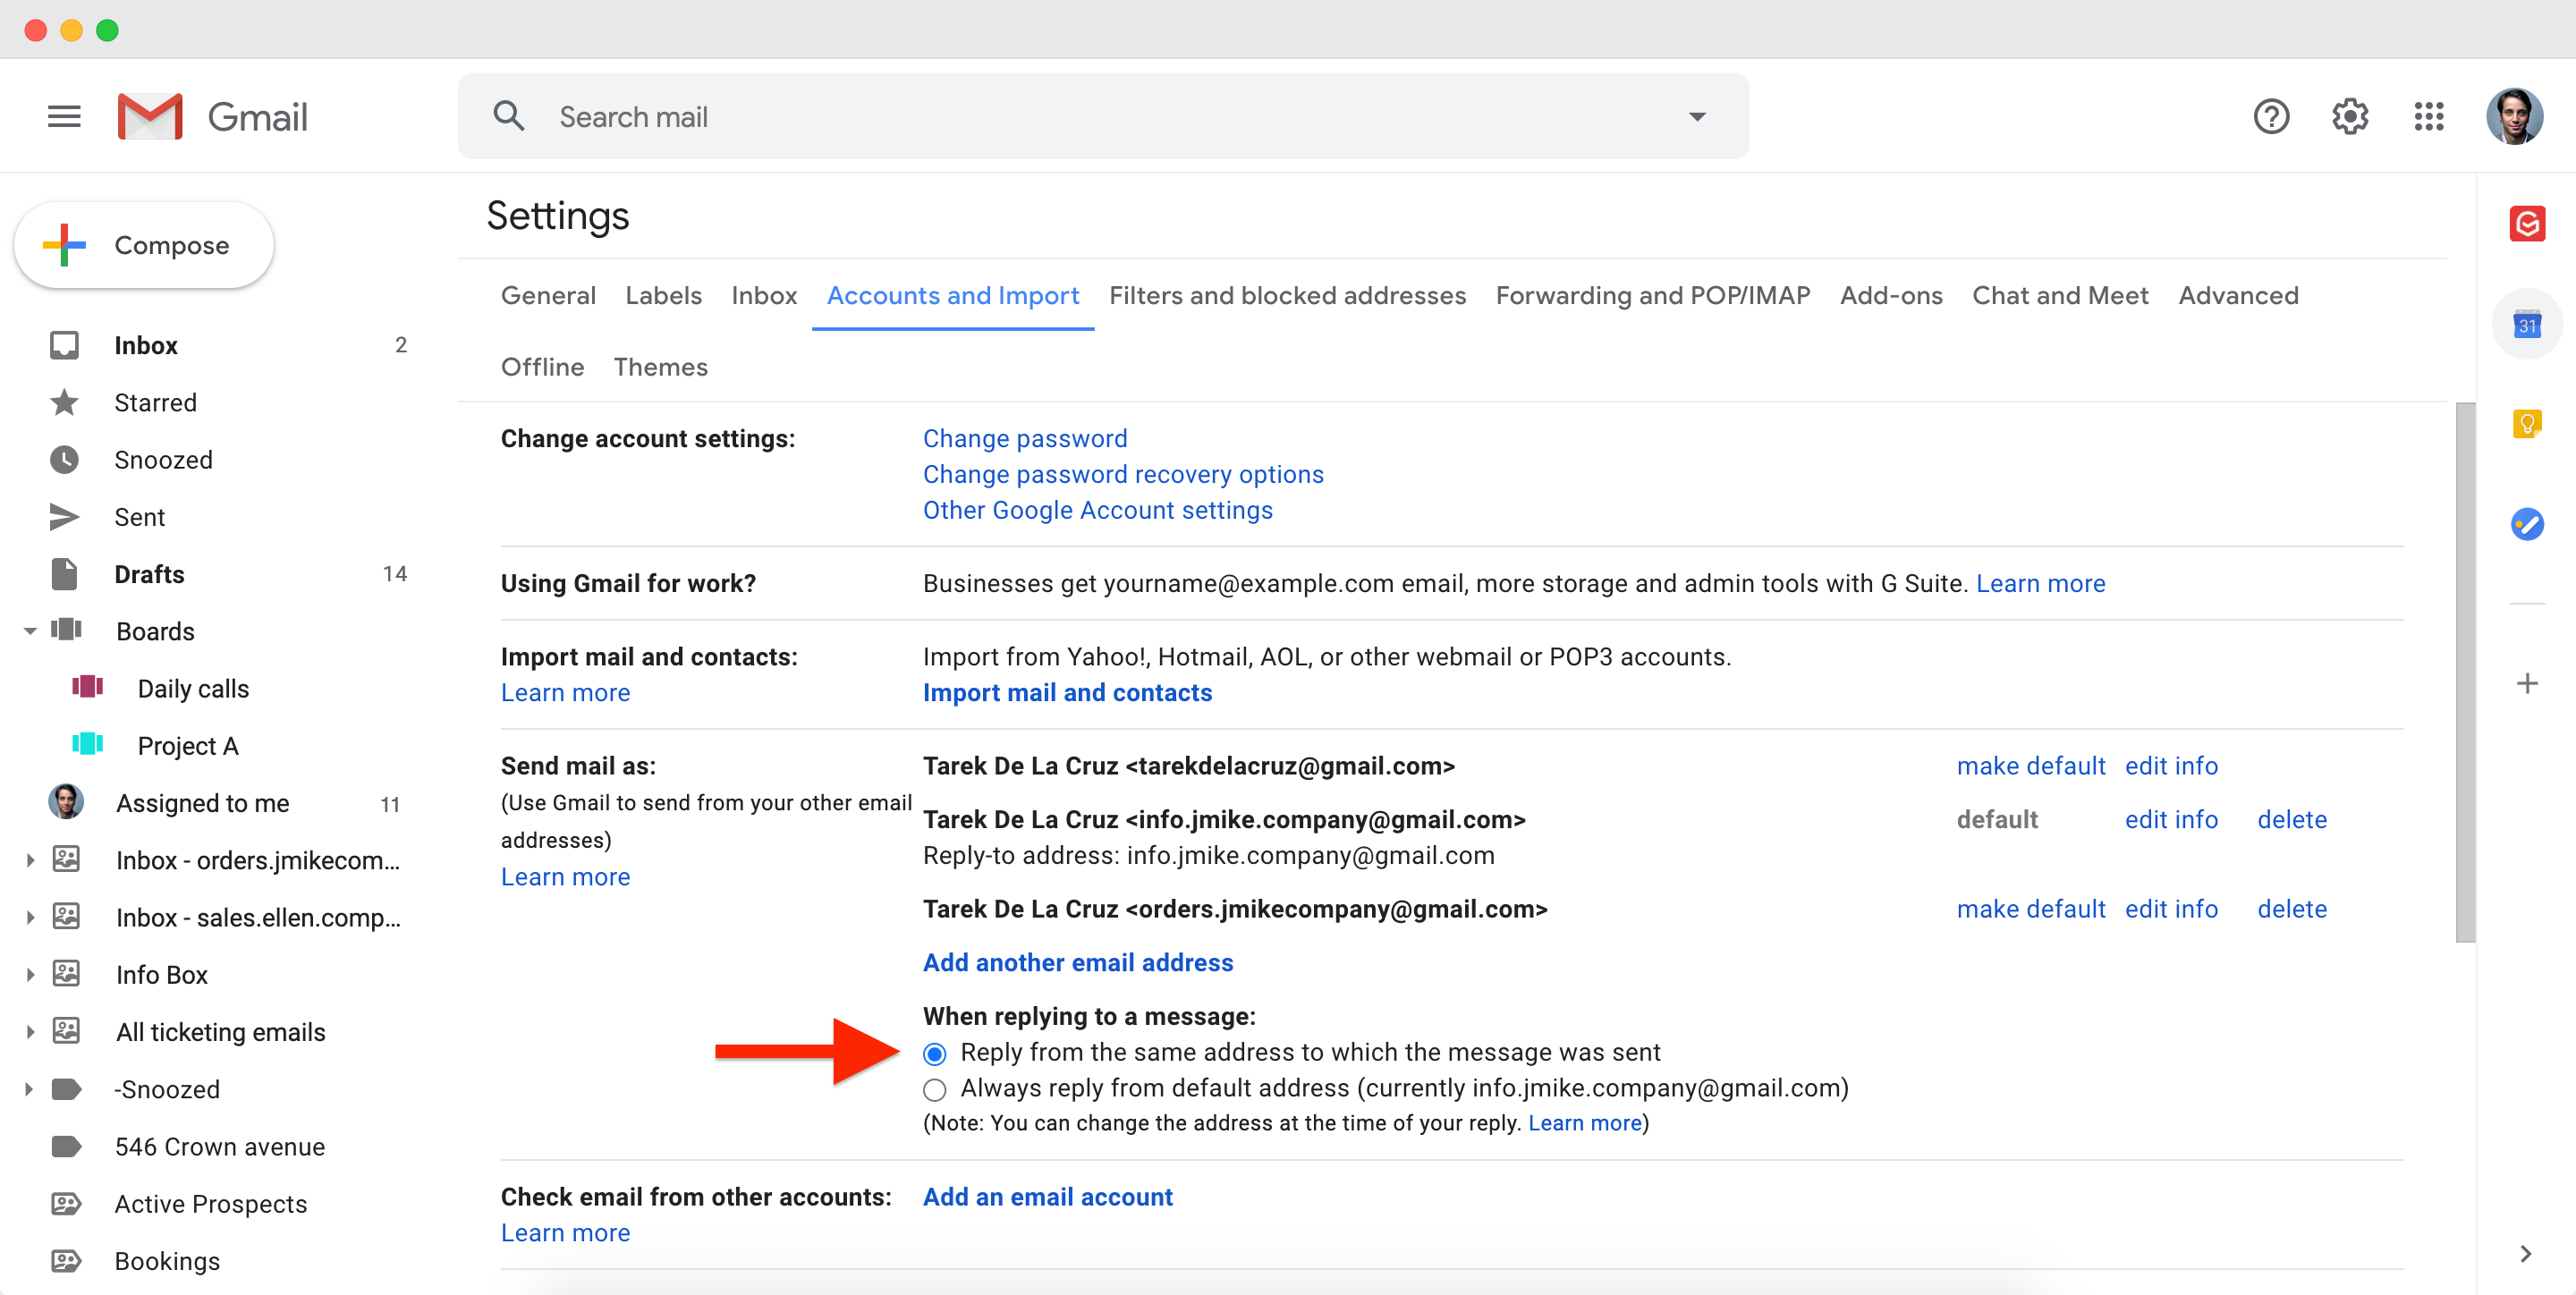
You can further set up your inbox to reply from the same address the message was sent to. In our example, this means that for emails sent to [email protected] the email address to reply from will be [email protected]. To do this, go to the Accounts tab in your Gmail, and switch on the below setting:

This is an inbox specific action and needs to be repeated for every user part of the shared inbox.
Create a custom signature
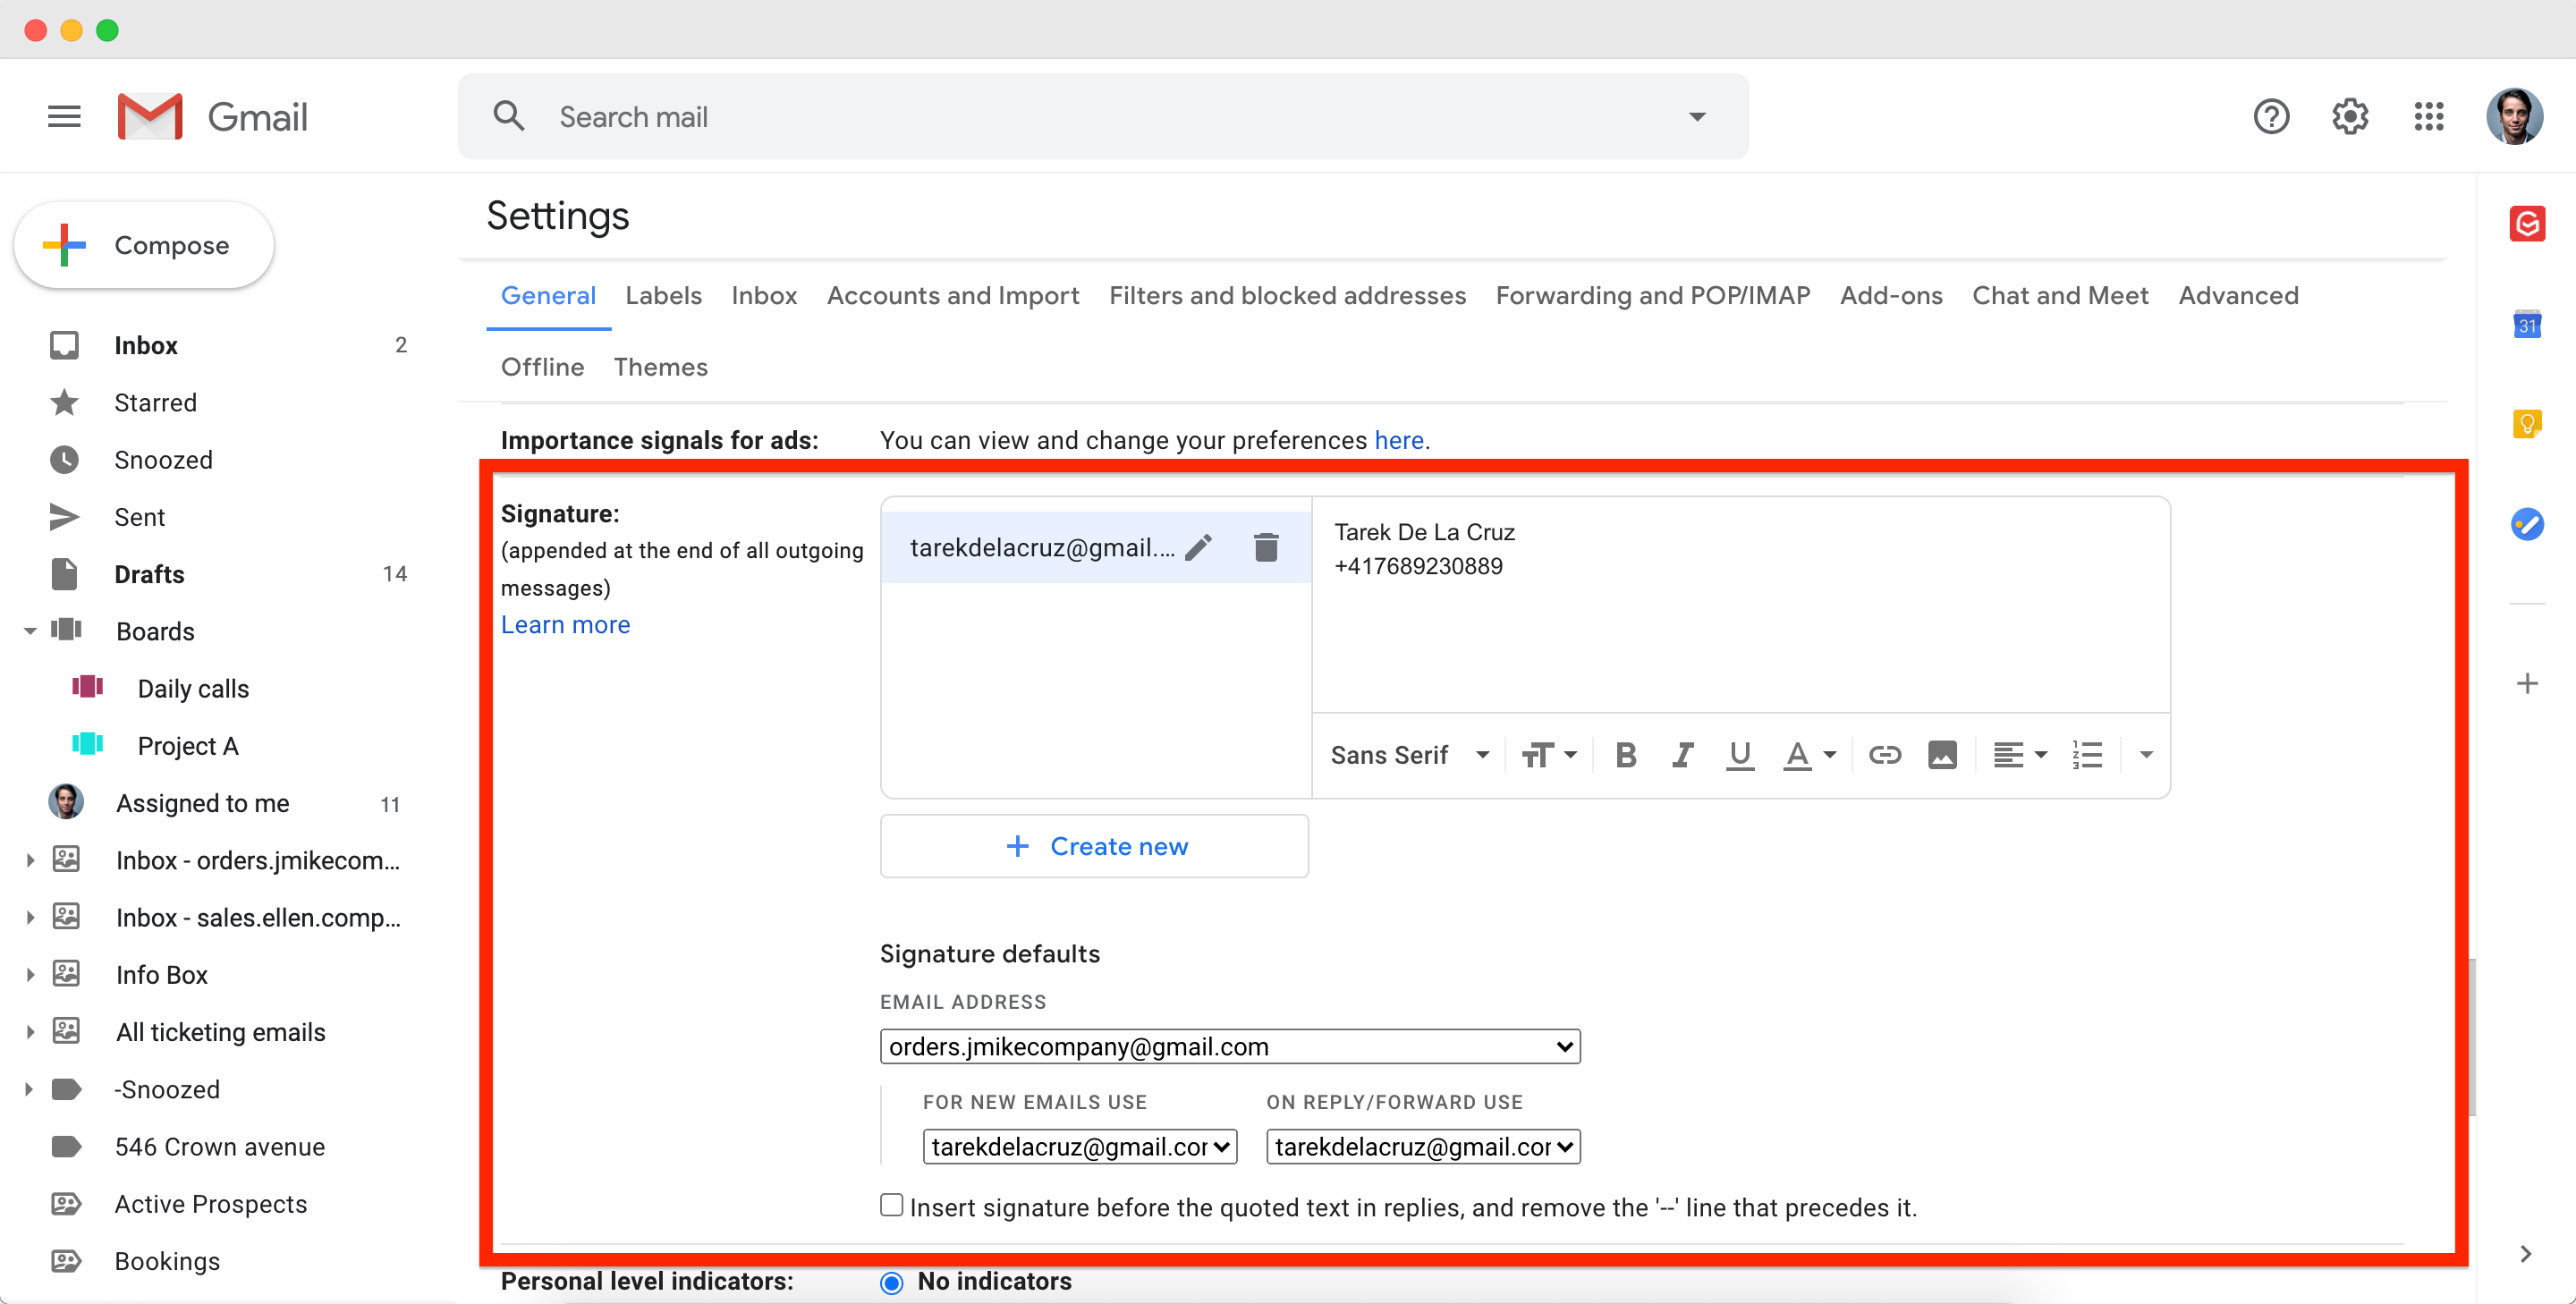
Finally, your teammates can set up custom signatures to be displayed when replying from the shared mailbox email addresses. Instead of using their normal Gmail signature, they can have a custom one to be displayed when replying from the shared inbox email.
- Open Settings on your Gmail, under the 'General' tab, you will find the 'Signature' option.
- Create the signatures you want
- Select the signature you want to use when you use the shared inbox's email address

How did we do?
Manage users of a workspace
How to stop sharing an email conversation?
